Acknowledgement(s):
- Proxmox Knowledge Base (Stuart Lawson):
- Random StackOverflow User:
- SynthMind:
Inspiration:
Prerequisites:
- Windows 98 ISO and Product Key
- ImgBurn: https://www.imgburn.com
- 7zip Installer for WIndows 98: https://archive.org/details/7-zip4.65WindowsInstaller
- Intel Network Adapter software version 10.1/10.3: http://vogonsdrivers.com/getfile.php?fileid=1902&menustate=0
Preparing the Support ISO
- Install ImgBurn
- Create a new folder and stick the 7zip installer and the Intel Network Adapters in that folder
- Open ImgBurn
- Create image file from files/folders
- Click through the prompts
- Verify the image is in the destination folder specified
Uploading the ISO to Proxmox VE
- Login to your Proxmox VE dashboard via your web browser
- On the left side of the dashboard, expand the Datacenter drop-down, and the node with your server name.
- Select your local storage, select ISO Images, and click Upload
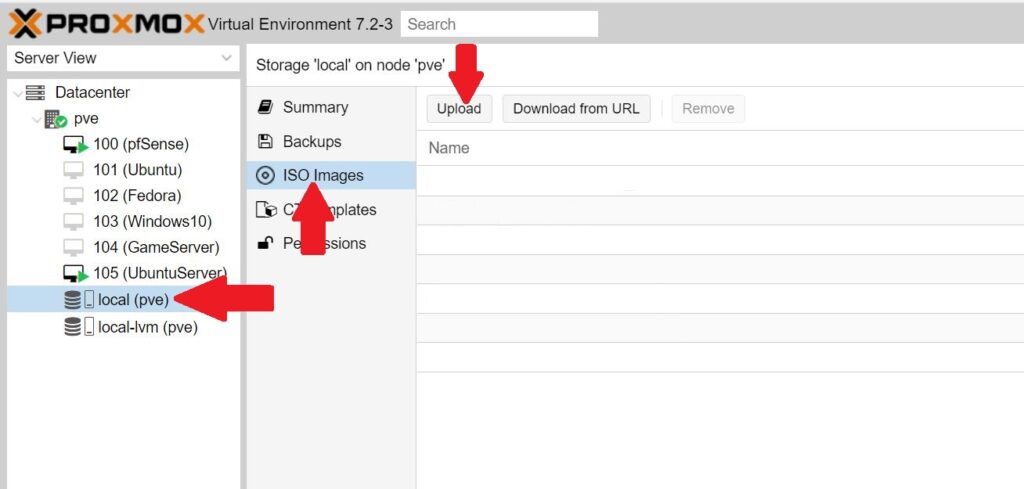
- Choose your Windows 98 Second Edition ISO and Upload
- Verify the ISO has successfully uploaded

Creating and Configuring the VM
- At the top right of the Proxmox VE dashboard, click the blue Create VM button:
- Under the General tab:
- Choose a VM ID number and enter a name for the VM.

- Continue to the OS tab:
- Choose Use CD/DVD disc image file:
- For Storage: leave the default value of local
- For ISO image: select the Windows 98 iso you uploaded earlier
- For Guest OS Type: select Microsoft Windows
- For Version: select 2000

- Continue to System tab:
- For Graphic card: select Default
- For Machine: select i440fx
- For SCSI Controller: select Default (LSI 53C895A)
- For BIOS: select Default (SeaBIOS)

- Continue to Disks tab:
- For Bus/Device: select IDE
- For Disk size(GiB): choose at least 1GB. In this example we select 32GB.

- Continue to CPU tab:
- For Sockets: select 1
- For Cores: select 1
- We selected 2 cores for this example, mostly to test the limits of the Windows 98 VM, but the VM most likely is not utilizing the second core
- For Type: select Default (kvm64)

- Continue to the Memory tab:
- For Memory (MiB): select at least 32MB of RAM, and no more than 1024
- We selected 1024 in our example
- Anything above 1024MB will cause issues with the Windows 98 VM
- Windows 98 was realistically not designed to handle more than 512MB of RAM
- For Memory (MiB): select at least 32MB of RAM, and no more than 1024

Make sure you know what you’re doing in this step by enabling networking
- Continue to the network tab
- Bridge: Select vmbr0
- Model: Select Intel E1000

- Continue to the Confirm tab:
- Click Finish
- Allow the VM to finalize setup, until it is visible on your list of VMs
Starting and Installing the Operating System
The VM is now ready to be started for the first time in order for proper installation.
- Select your Windows 98 VM on the Server View window on the left side of the Proxmox Dashboard
- Click the Start button
- Choose the Console tab to view the video output
- When the OS loads, choose option 2. Boot from CD-ROM

- Select option 1. Start Windows 98 Setup from CD-ROM
- You may have to wait about 1 minute, ignore any status messages until the Microsoft Windows 98 Setup page shows:
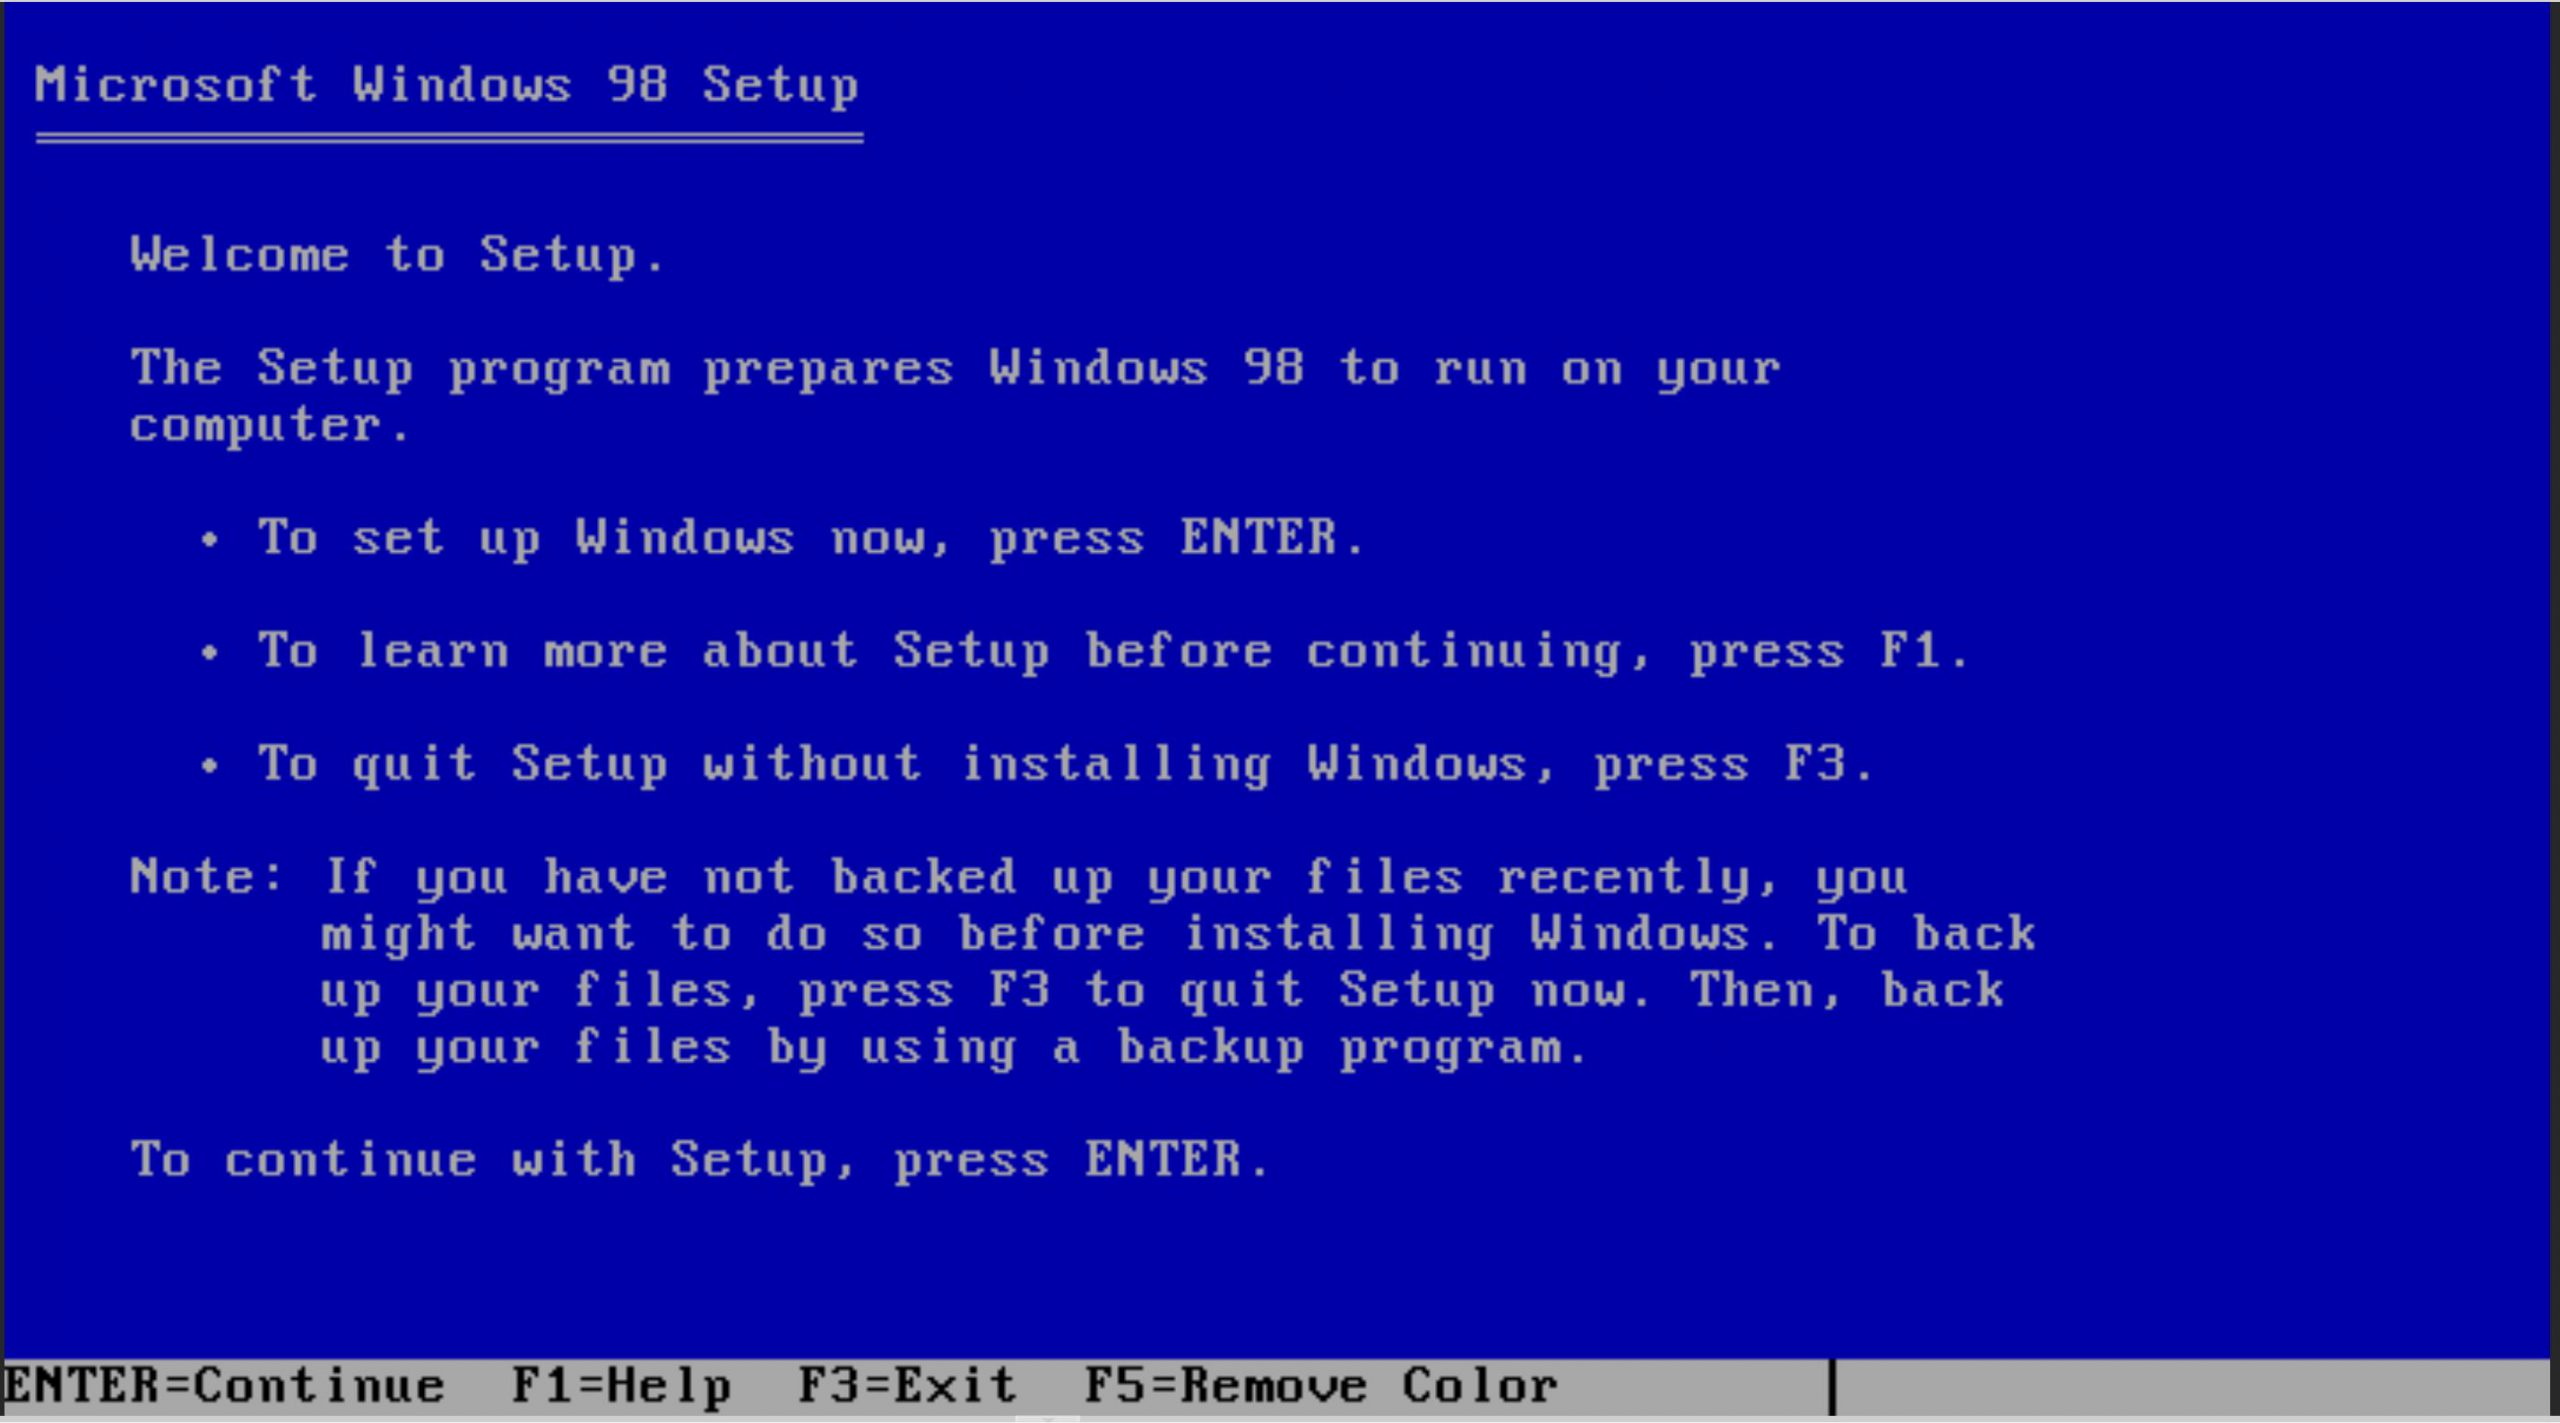
- Press your Enter key to continue past the “Welcome to Setup” page
- If a prompt to “Configure unallocated disk space” shows hit your Enter key
- If using over 512MB drive space, choose “Yes, enable large disk support”
- When you get to the step regarding restarting your computer, hit Enter
- VM will reboot
- Select option “2. Boot from CD-ROM”
- Wait a minute or so until you see the following screen:

- Wait for drive to format
- Verify you are thinking about playing Minesweeper
- After drive is formatted, hit the Enter key to “perform a routine check on your system”
- Allow Microsoft ScanDisk to check drive C:
- Verify the Windows 98 Setup screen shows up
- Press “Continue”
- The mouse will be difficult to use
- Setup is preparing the Windows 98 Setup wizard, let the process continue
- Select C:\Windows for Directory, hit Next
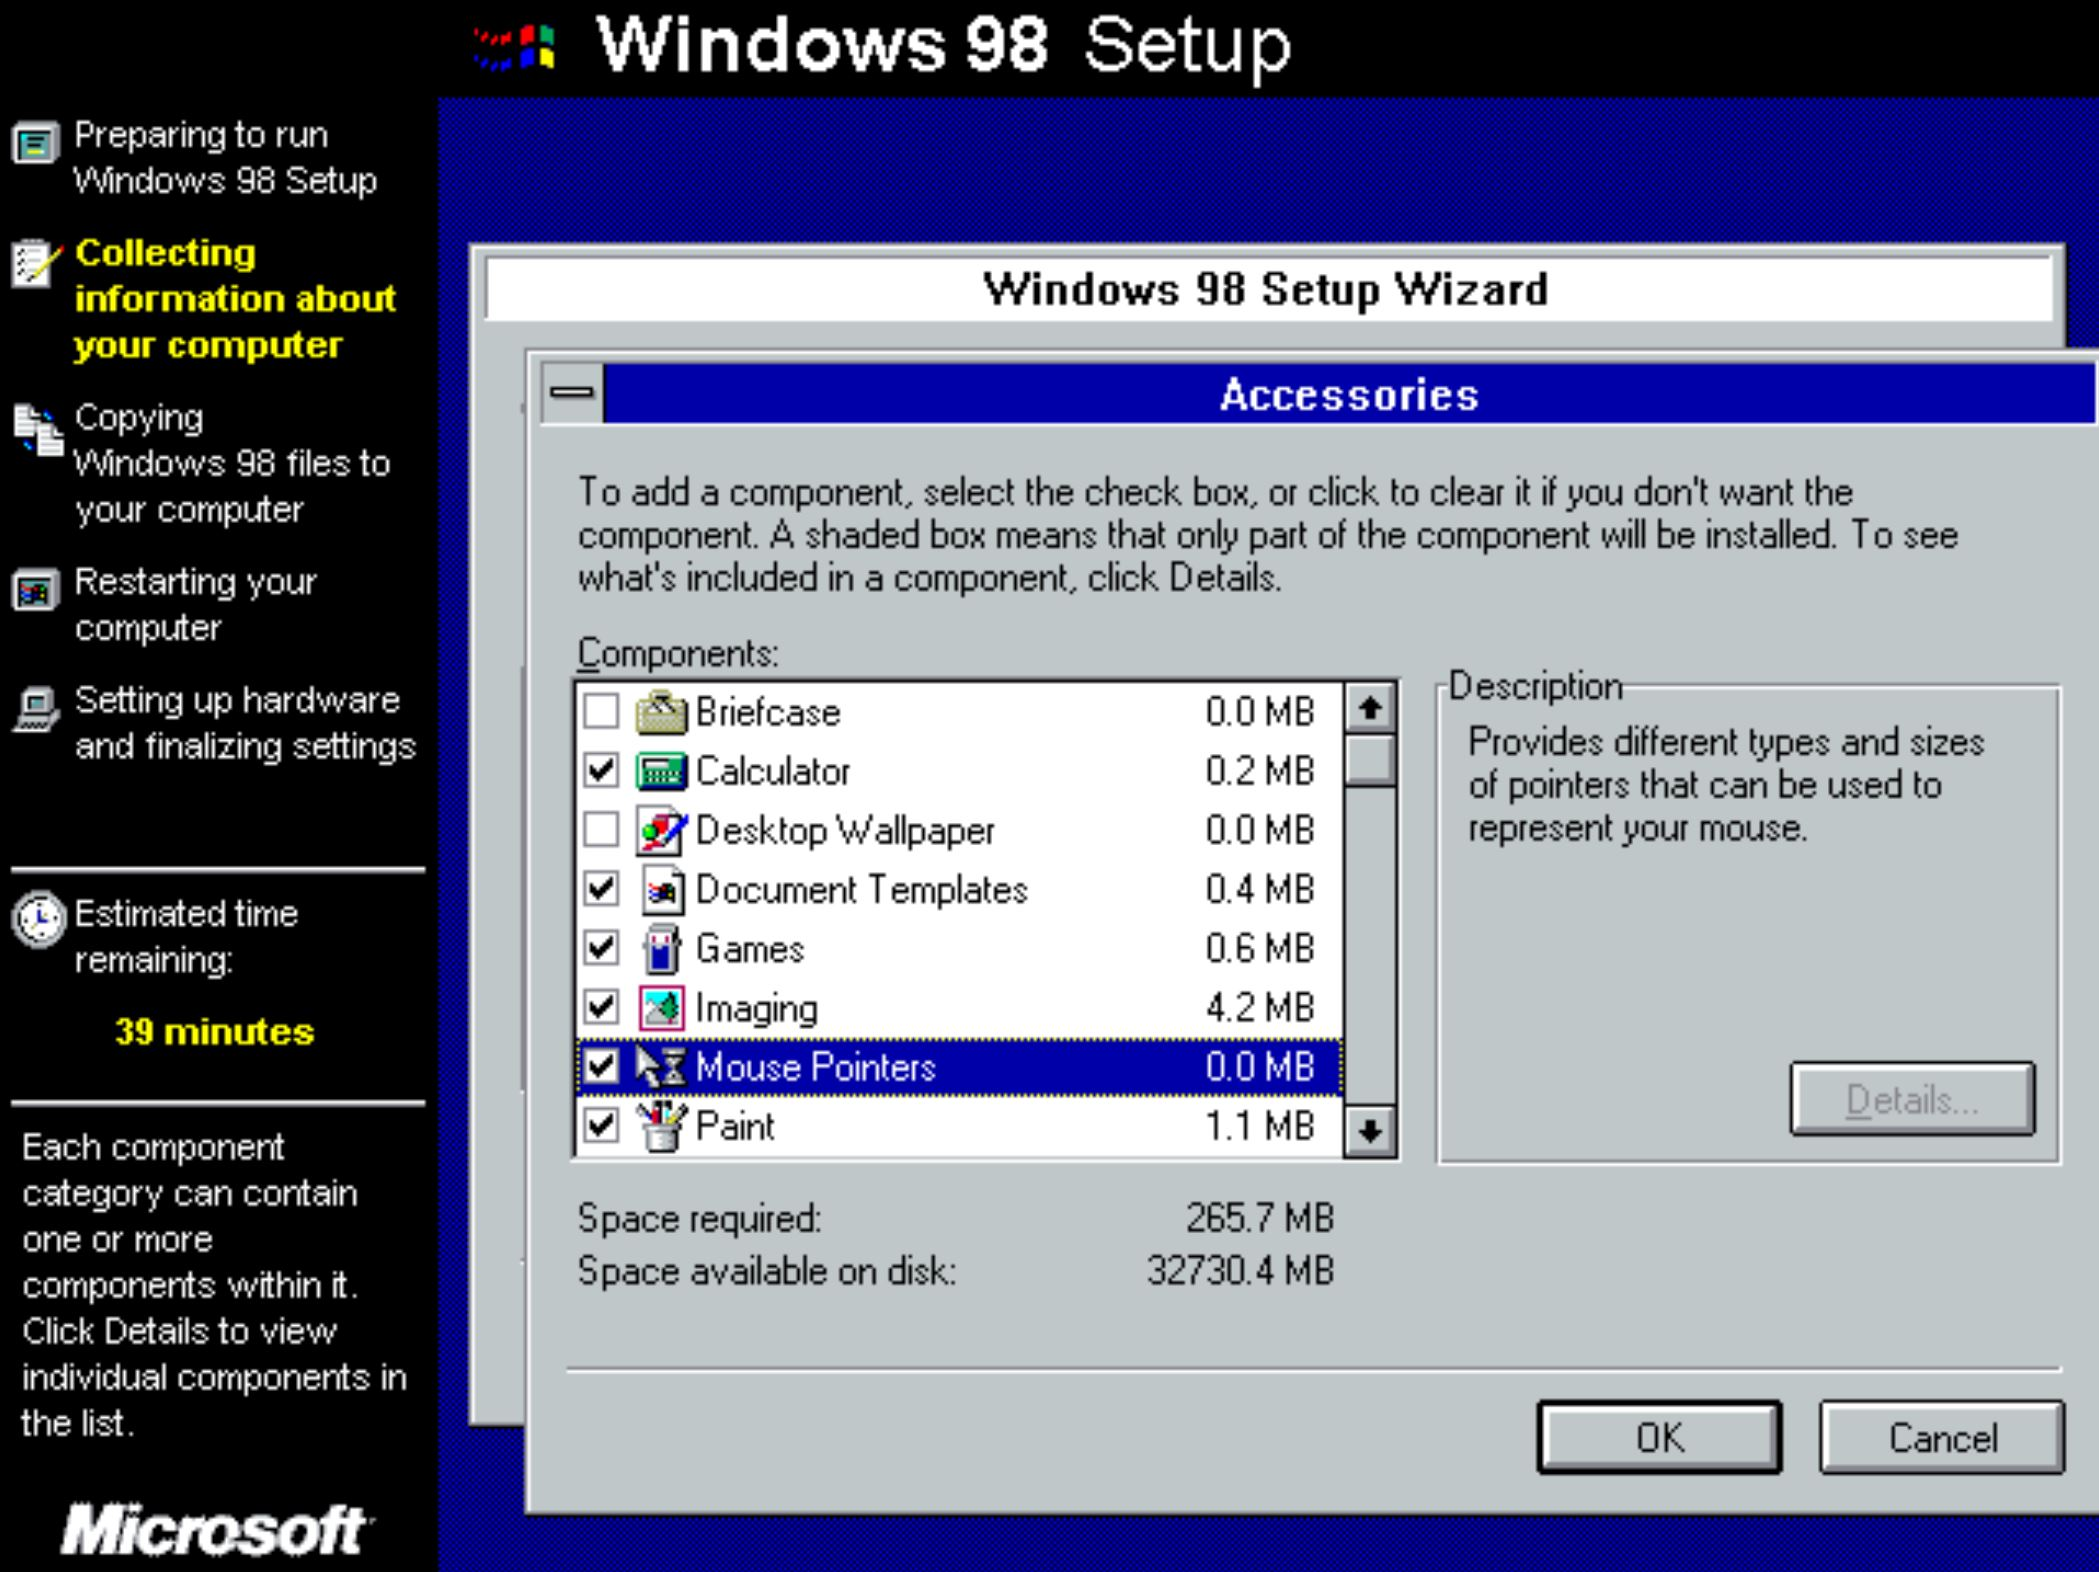
- Select Typical in this example, we selected Accessories
- Hit “Next”
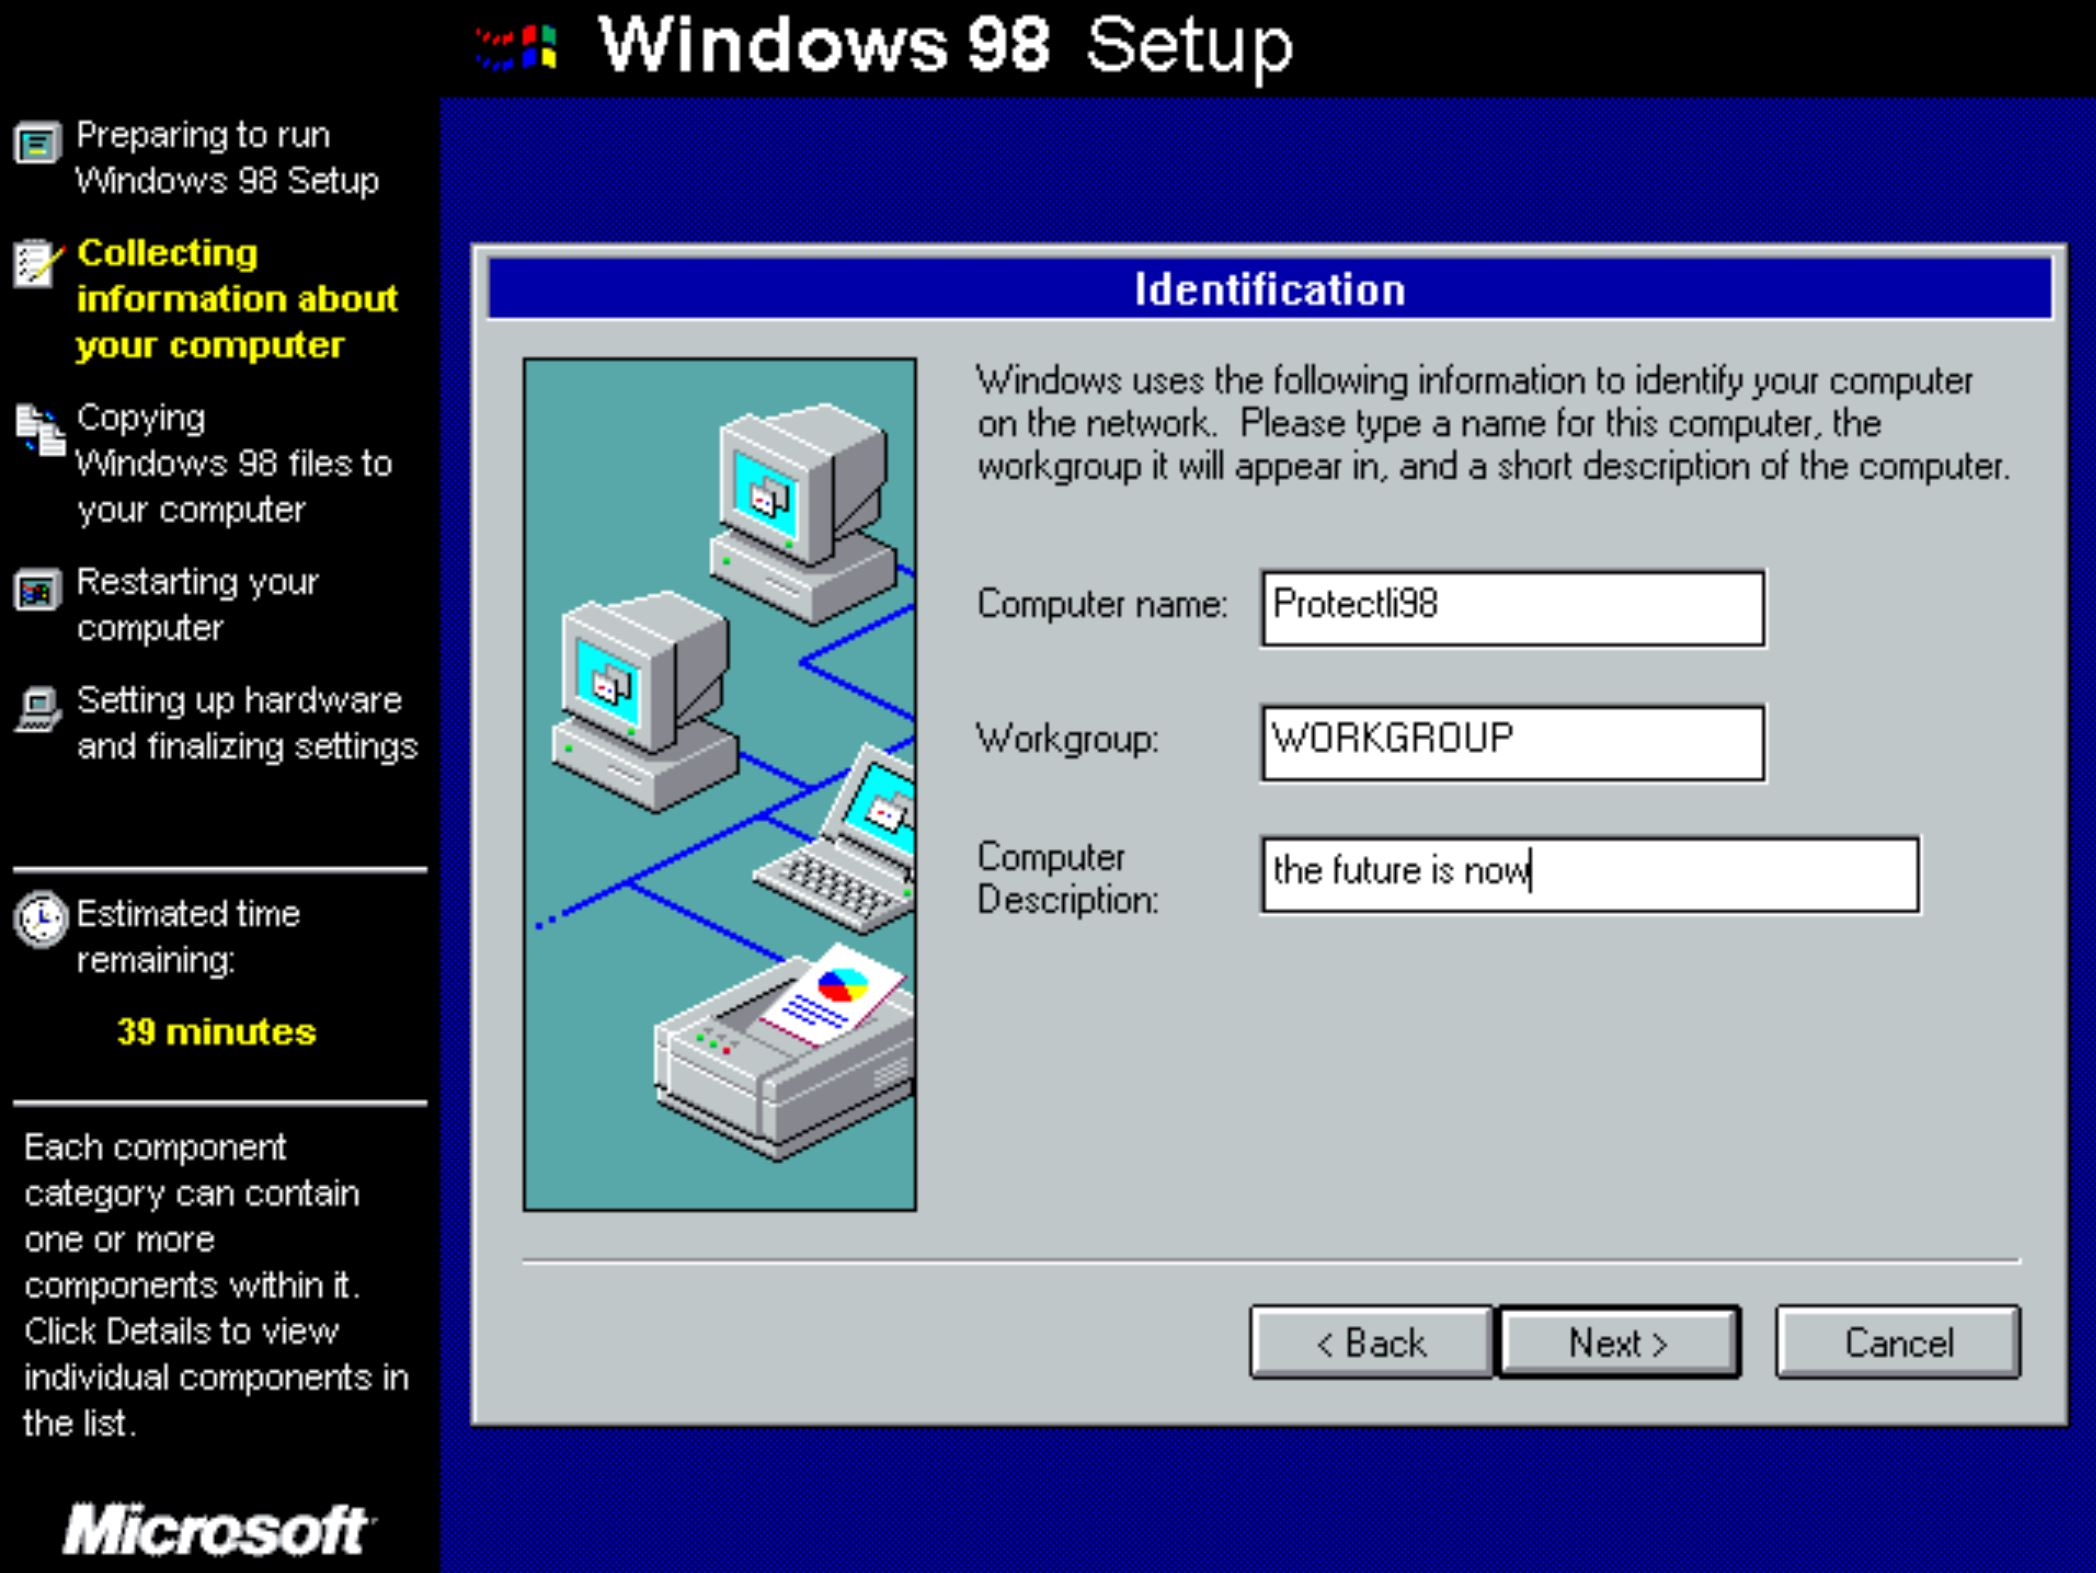
- Choose your computer name
- Hit “Next”
- Select “Next” for Computer Settings to confirm keyboard layout and regional settings
- Select your country for Establishing Your Location, hit “Next”
- Hit “Next” on Start Copying Files page
- Verify you are” sitting back and relaxing while Windows 98 installs on your computer”
- Verify you are reminiscing of the dial up connection tone
- After an excruciatingly long amount of time, a “Restart Computer” prompt should display
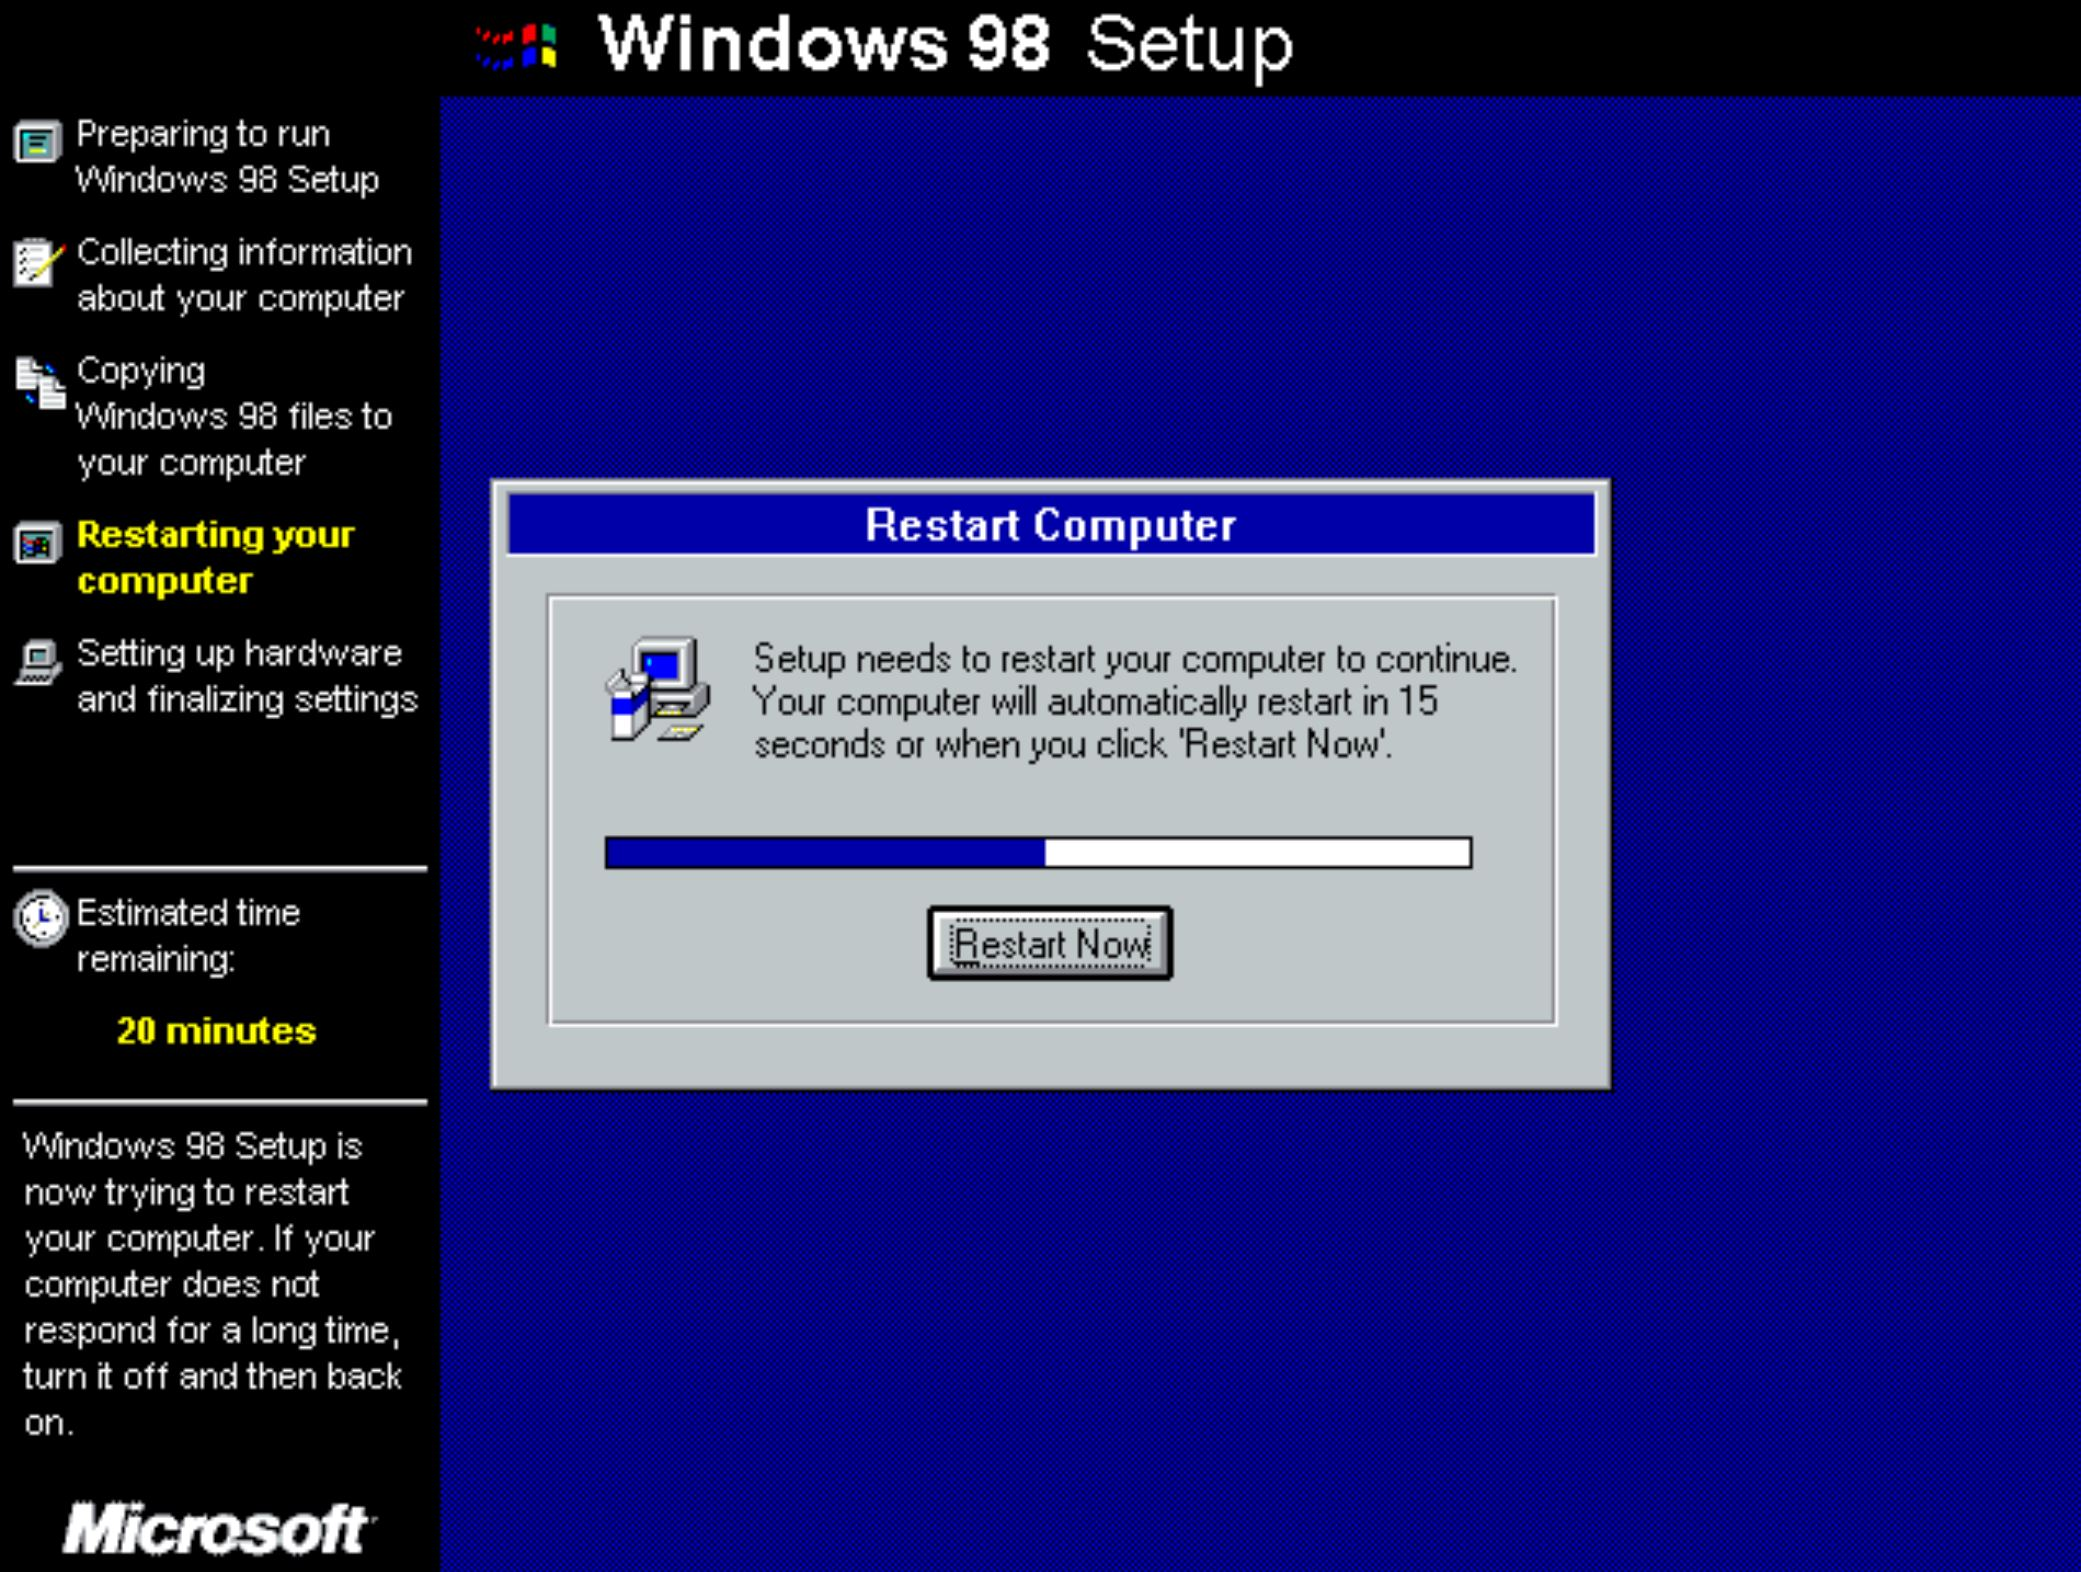
- Restart, let the OS reboot
- If any errors arise, try to ignore them and hit enter to continue
- Enter your name when prompted
- Accept agreement
- Enter your product key (no we won’t supply one)
- Continue by hitting “Finish” and allow installation to continue
- Reboot if prompted
- Set date/time
- Let setup continue
- Windows will restart until Prompted for a Password
- Enter your desired Password
- Drivers will install – for now
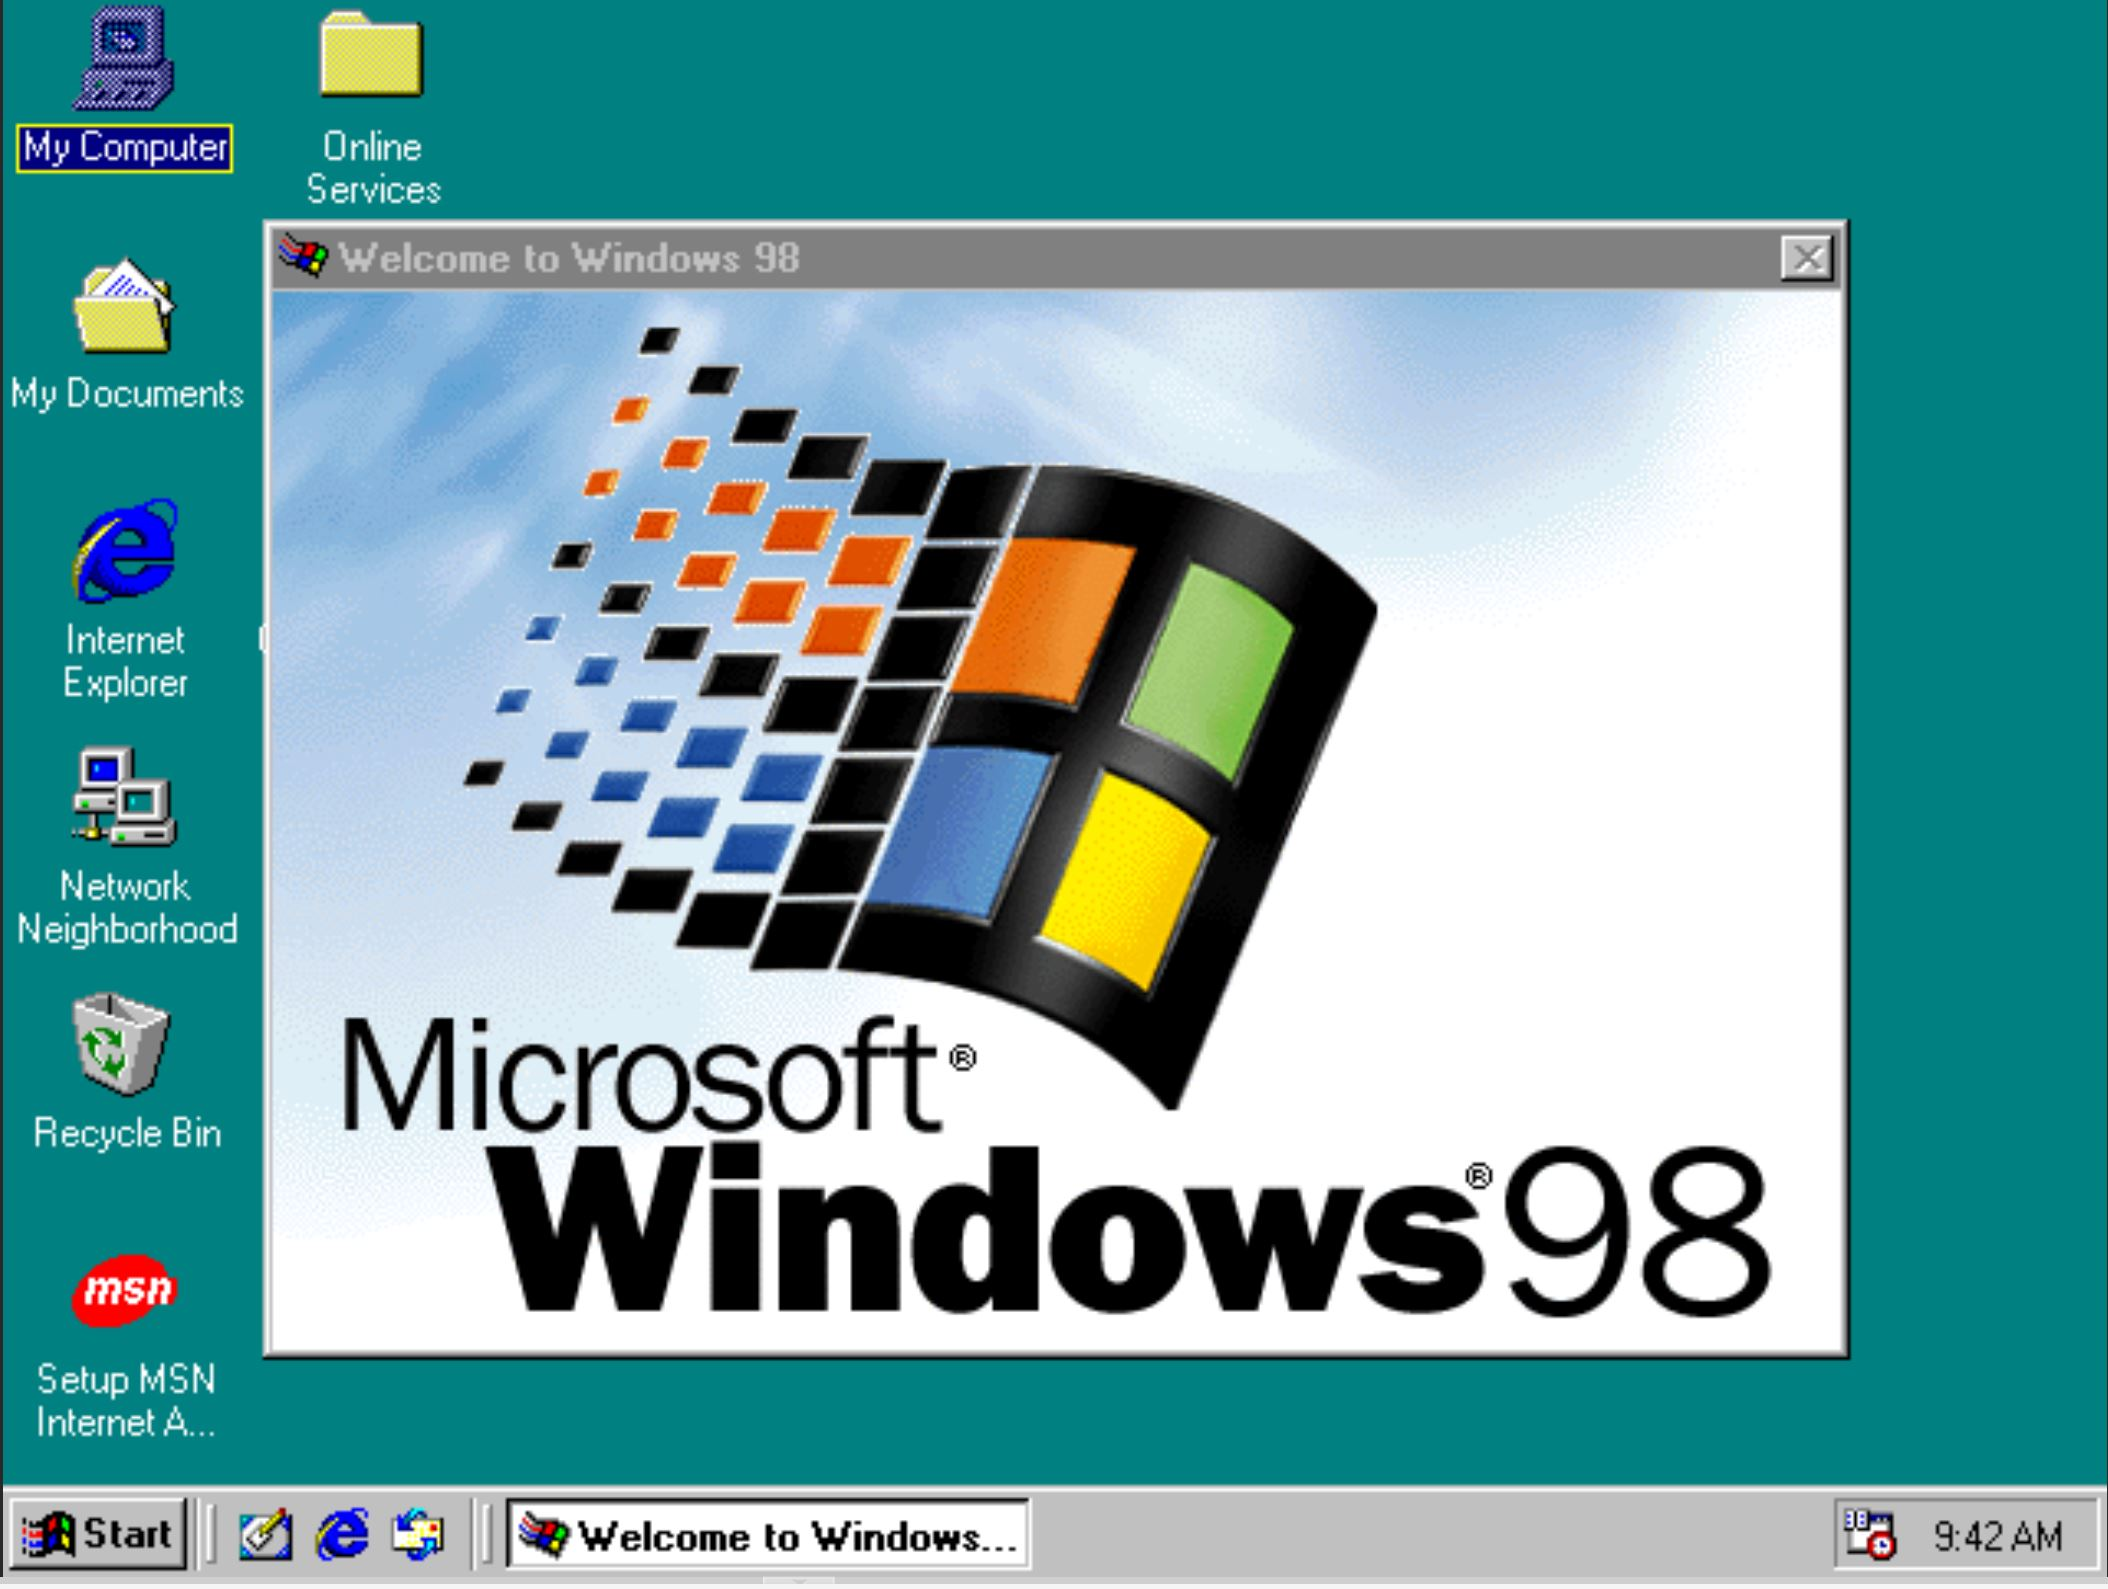
- Windows 98 is now installed! Wow! Look at that GUI! Isn’t it beautiful? Bill, you’ve done it again.
You get drivers, and you get drivers, and you get drivers!!!!!
- You saw it, now let’s properly shut it down by clicking the Start button in the bottom left hand corner
- Shut Down…
- Now, with that ISO image we created earlier, let’s attach it to the Windows 98 image.
- Go to your virtual machine, hardware, Add

- Click Add
- You can now start your virtual machine back up.
- Install 7zip on the Windows 98 machine
- 7zip the Intel Drivers onto the Desktop
- Double click on the PRO98_10.1 installer and install the program.
- Restart the VM
- Once you log in and verify that the machine is now loaded, right-click on My Computer and click Properties
- Click Device Manager
- You may notice that there is a Plug and Play BIOS Device that is marked with a yellow indicator
- Right-click on that, click Properties, Driver, Update Driver
- Click Next
- Select “Display a list of all the drivers in a specific location, so you can select the driver you want”. Click Next
- Select “Show all hardware.”
- Scroll down and select “PCI bus”
- If at any time the prompt asks you to Choose a file, make sure you select your E:\WIN98 folder (E: being the drive that contains the Windows 98 ISO)
- After that you may be prompted to restart your computer, definitely restart it.
- You will notice that all drivers are now being noticed.
- You will be prompted to find the files, for any networking file, make sure you to select C:\Intel10.1\Pro100\Win98SE and it will autofill, other than that select E:\WIN98
- After that, enjoy your new Windows 98
If you have any questions, feel free to contact me: https://stevesec.com/contact